Setting up vertical drilling knowledge.
There are few sample drill cut knowledges in the sample drawing. Each of them is designed to show a slightly different configuration to drilling.
OnePassDrill
There are several ways to deal with vertical drilling. The first is the most basic method, using Drill Motions.
Using the drawing, Vertical_Boring_Sample_1.dwg (available here), Drill Motions will be demonstrated with its various options.
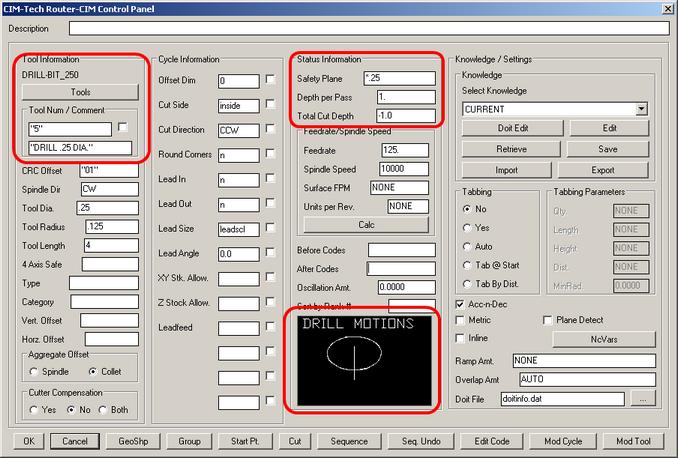
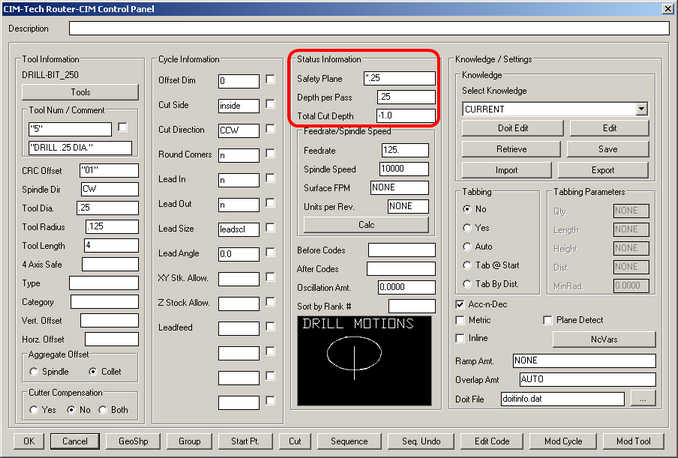
The important data for the first example is that we have selected a Drill-Bit from the tool list, set the depth and depth per pass to make 1 pass in Z, and selected the Drill Motions cycle from the list of available cycles.
Making a toolpath with these parameters yields the following results:
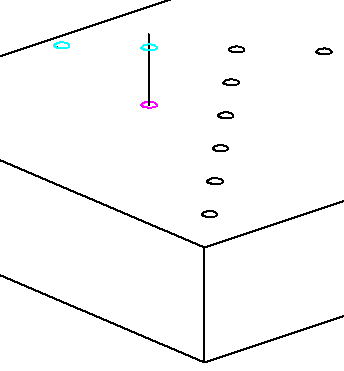
This yields one pass from .25 above the part, down to Z-.75 and then back up to Z.25 again. The resulting NC Code file might look like this:
(DRILL .25 DIA.)
G28G91Z0M05
G90T2005M06
T102
M03S10000
G00G17G55X5.Y5. <<-- Rapid to the X,Y position of the hole.
G00G43H5Z.25 <<-- Start out .25 above the part.
G01Z-1.F125. <<-- Feed down into the hole to Z-.75 at 125 Inches Per Minute.
G00Z.25 <<-- Rapid back up out of the hole to Z.25.
G28G91Z0M5
This is a standard Drill Motions cut and no special data is necessary to input other than the depth you wish to cut and the feedrate and tool settings you wish to use.
TwoPassDrill
Drilling in multiple passes for the depth is not any more difficult than drilling in one pass. The only parameter you need to change would be the Depth Per Pass. This will allow pecks of the specified depth as many times as necessary to reach the desired Total Cut Depth.
Using the following parameters:
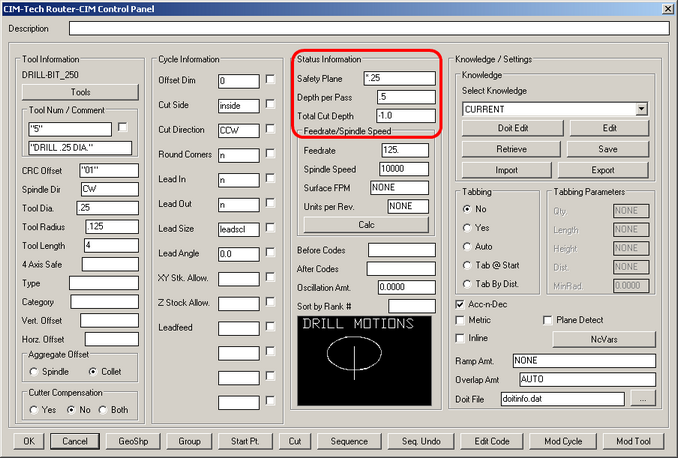
Will yield the following results in the drawing and the code:
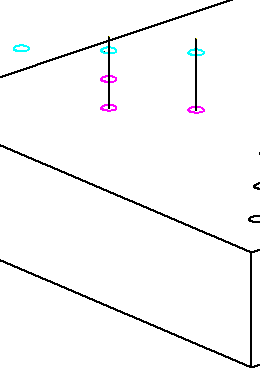
The hole on the left is the new cut, showing 2 passes in Z. This will yield the following code:
(DRILL .25 DIA.)
G28G91Z0M05
G90T2005M06
T102
M03S10000
G00G17G55X4.Y4. <<-- Rapid to hole location in X,Y.
G00G43H5Z.25 <<-- Rapid to .25 above the hole
G01Z-.5F125. <<-- Feed down to the first Z depth at 125 Inches Per Minute.
G00Z.25 <<-- Rapid back to Z.25 above the hole.
Z-.4 <<-- Rapid down to .1 above the next depth (there is no material here because of the last pass).
G01Z-1.F125. <<-- Feed down to the next depth at the previous feedrate.
G00Z.25 <<-- Rapid back up to the safety plane.
G28G91Z0M5
FourPassDrill
Setting the Depth Per Pass to an even smaller number will simply yield more passes in Z:
Setting the Depth Per Pass to .25 in a 1" hole will give 4 passes. It is important to note that the Depth Per Pass is Always a Positive Number!
Using these parameters will make a toolpath like this:
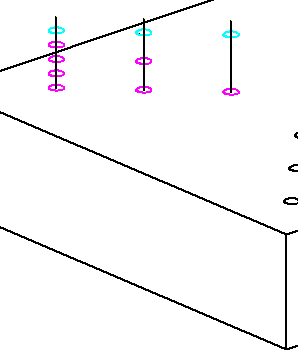
The leftmost hole as 4 passes clearly showing on the hole. The code for this will look something like the following:
(DRILL .25 DIA.)
G28G91Z0M05
G90T2005M06
T102
M03S10000
G00G17G55X3.Y3. <<-- Rapid to X,Y position.
G00G43H5Z.25 <<-- Rapid to Z.25 above the
G01Z-.25F125. <<-- Feed down to first depth in Z.
G00Z.25 <<-- Rapid up to Safety Plane in Z.
Z-.15 <<-- Rapid to .1 above the next pass.
G01Z-.5F125. <<-- Feed down to next depth of cut.
G00Z.25 <<-- Rapid up to Safety Plane in Z.
Z-.4 <<-- Rapid to .1 above the next pass.
G01Z-.75F125. <<-- Feed down to next depth of cut.
G00Z.25 <<-- Rapid up to Safety Plane in Z.
Z-.65 <<-- Rapid to .1 above the next pass.
G01Z-1.F125. <<-- Feed down to next depth of cut.
G00Z.25 <<-- Rapid up to Safety Plane in Z.
G28G91Z0M5
As shown there are no real difficult parameters to set in order to turn a one pass Drill Motion cut into a cut with several passes in Z. Only one parameter needs to change to effect the desired result.