How to Draw a Pocket Bore
In order to draw a Pocket Bore inside of AutoCAD you will need to be comfortable with the following commands:
Polyline
Line
Arc
Circle
Rectangle
Join
Extrude
Subtract
Union
The following concepts are useful when drawing this feature inside of AutoCAD:
Defining a UCS
Object Snaps
Coordinate Filters
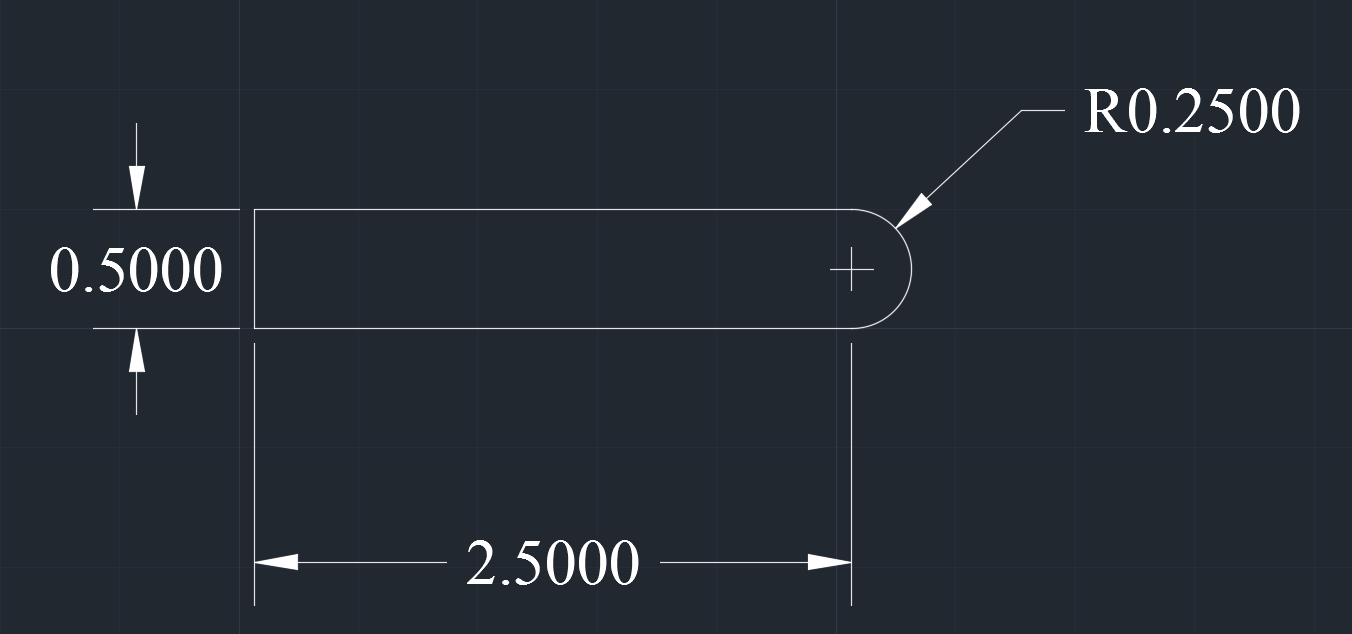
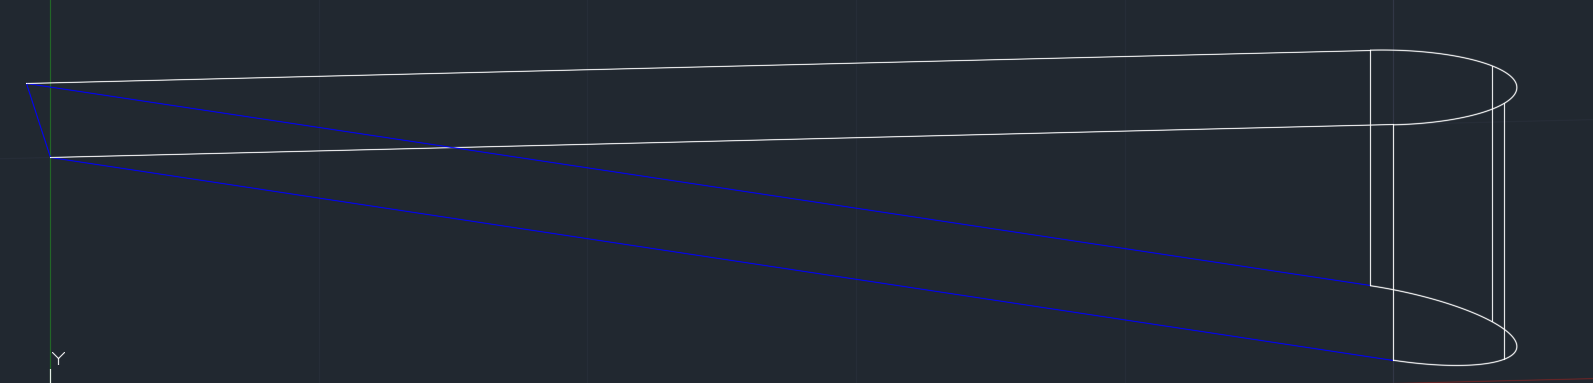
1.) The first feature that needs to be drawn is the rectangle with the semi-circle at the end. For this tutorial I will be creating a feature that has a semi-circle with a radius of 0.25, a width of 0.50, and a length of 2.5.
Note: The diameter of the semi-circle needs to match the width of the rectangle.
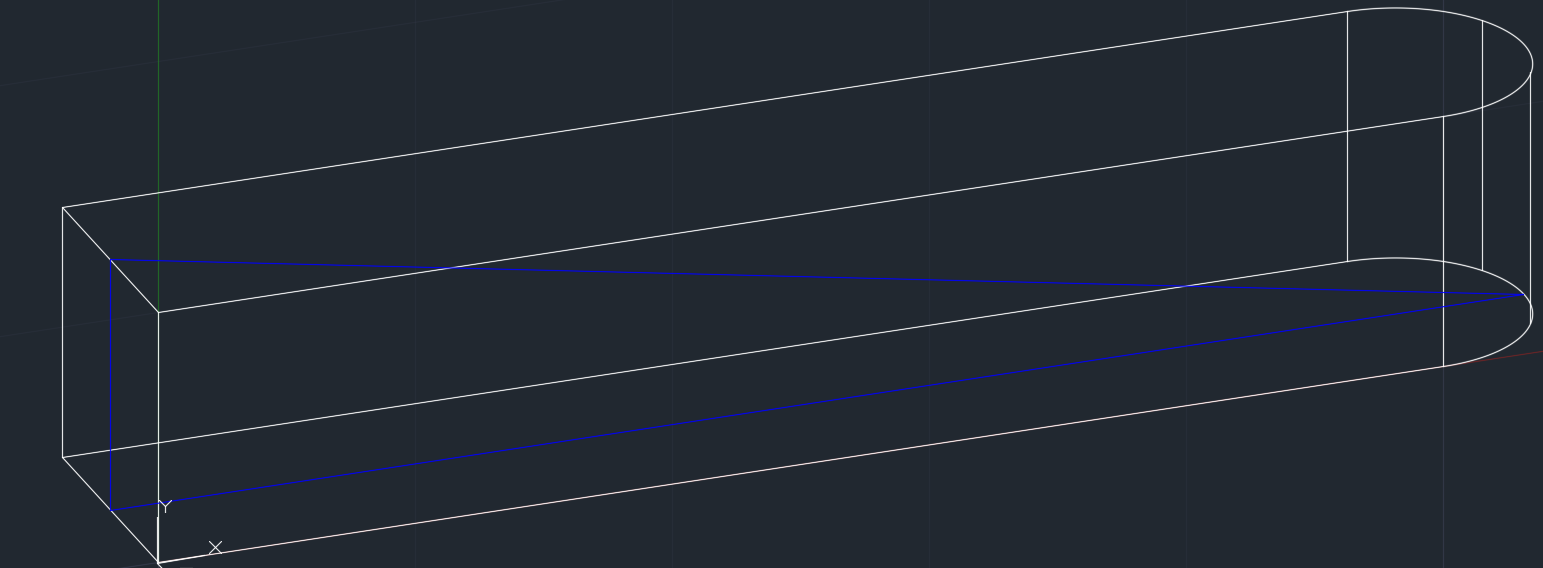
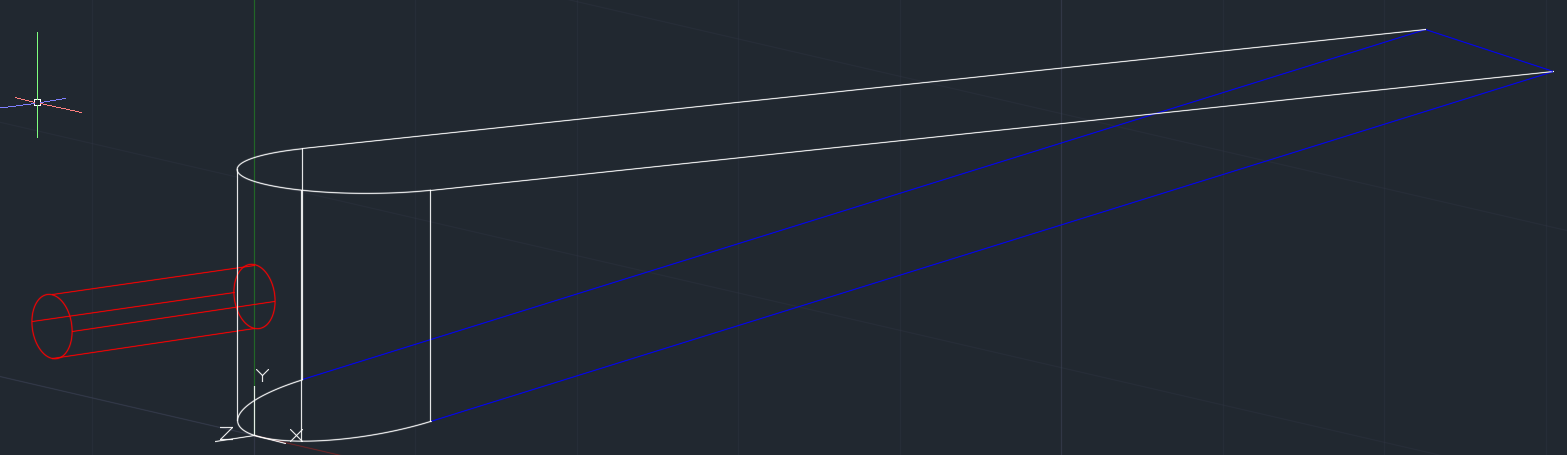
2.) Next we will Extrude this feature to the depth we want the Pocket Bore feature to be. In this tutorial we will be using a thickness of 0.50
Note: If you didn't use the Polyline command to draw the feature you might need to Join together the segments so they are all one continuous shape.

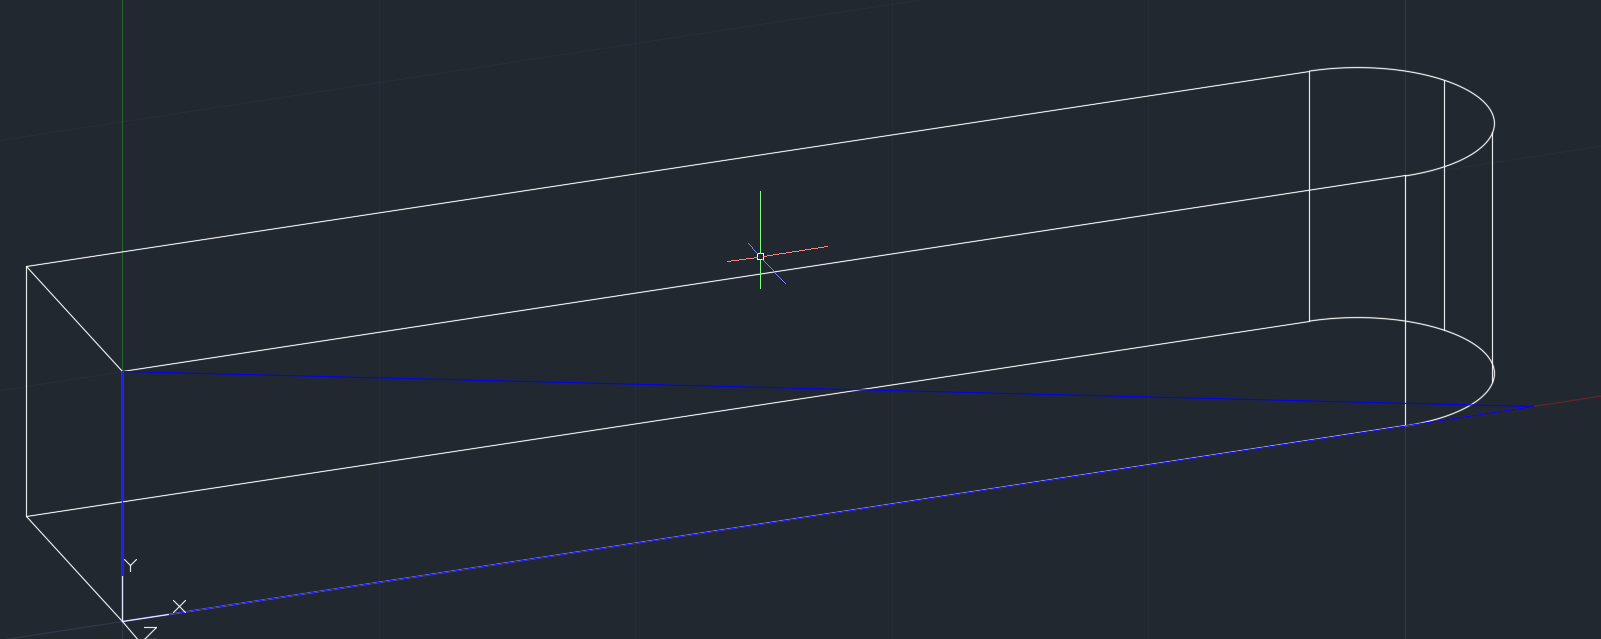
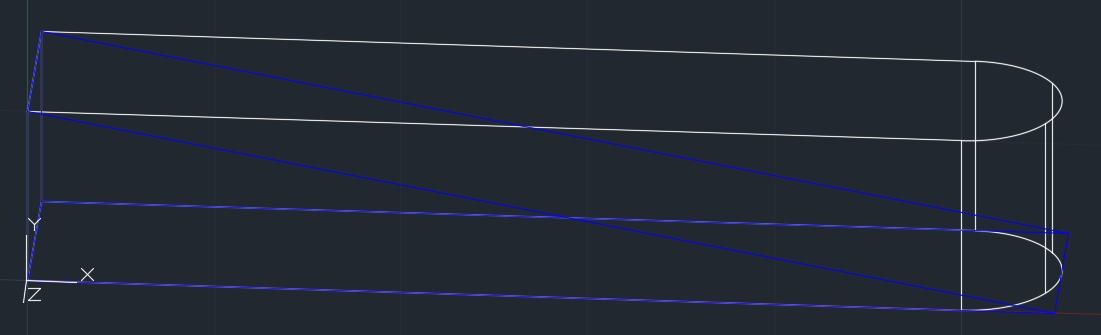
3.) Next we will need to create another solid so we can create the desired feature. In this step we create a shape that comes to a point at the quadrant of the circle, at the midpoint of the width of the rectangle. The shape is shown below in Blue
4.) Next we will move the blue shape to the edge of the feature.
5.) Using the feature, shown in Blue, we will create another solid by using the Extrude command that is the same width as our first feature, shown in White.
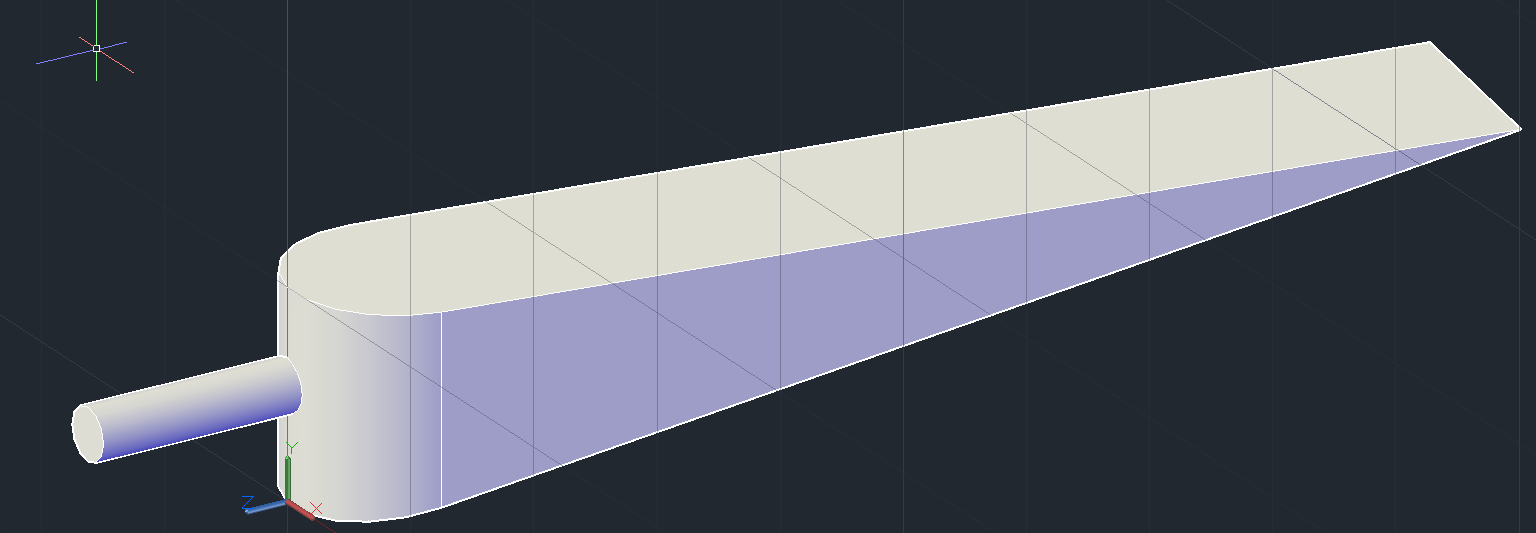
6.) Using the Subtract command we will subtract the Blue feature from the White Feature. The result should look like the image below.
Note: There are many ways to get to this result, this tutorial is only showing one method.
7.) Now that the first feature is created, we now need to create the hole located at the quadrant of the circle, and the midpoint of the width of the feature. The circle in this tutorial will be a diameter of 0.125 and shown in Red
Note: You will most likely need to change your UCS in order to accomplish this.

8.) Depending on how deep you want the hole to go you will need to Extrude accordingly. In this tutorial we will be making a horizontal hole that is 0.50 in depth.
9.) The last step involves creating a Union of these two features in order to make one solid. Once they are one solid the result should be what is shown below.
10.) Save the Pocket Bore that you have created, and when needed Insert your pocket bore into your drawing and Subtract it from the part. Defining the Pocket Bore feature as shown in this tutorial will allow Solid-CIM 3D to recognize the feature.

