Adding Name/Label Information in Solidworks
Adding a Name to a 3D Solid in Solidworks:
Naming a 3D solid in Solidworks is not necessary. The name of the Solidworks SLDPRT file becomes the name of the part when it is processed through Solid-CIM 3D.
Adding Label Information to a 3D Solid in Solidworks:
SolidWorks allows users to create Custom properties which can then be used through Solid-CIM to denote additional information for that particular part.
Currently, we allow for the export of 8 Custom property fields. The custom properties can be accessed through the properties for the Solidworks part.
1) Select the part in the Solidworks assembly or in the part view.
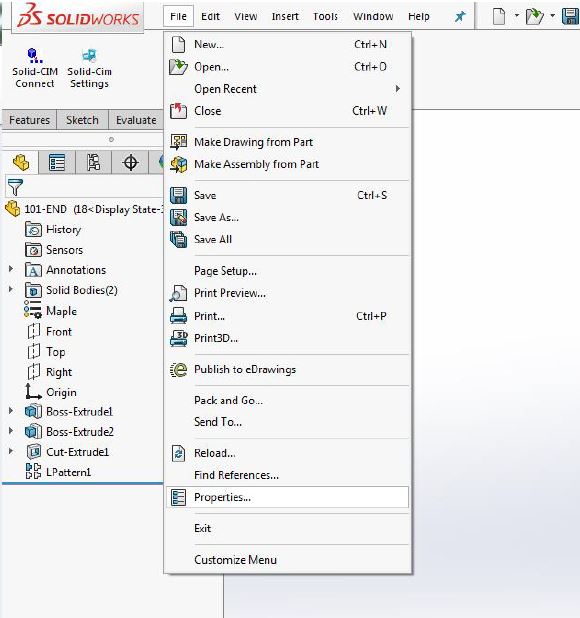
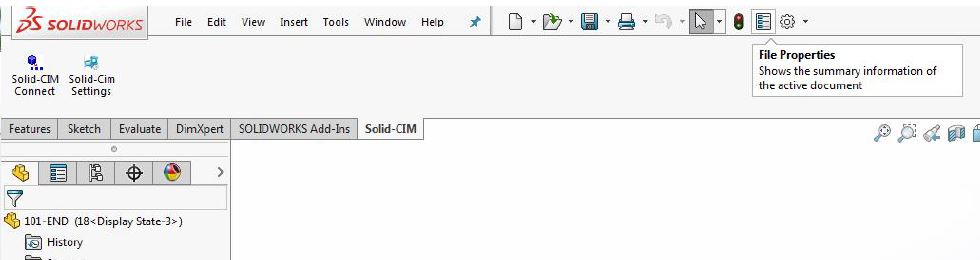
2) Select properties from one of these two locations:
Note: If you have multiple assemblies in an assembly, you may need to go to the assembly level to access the part.
3) Once you select the Properties option, it will open the Solidworks properties window where you will select on the tab 'Custom'.
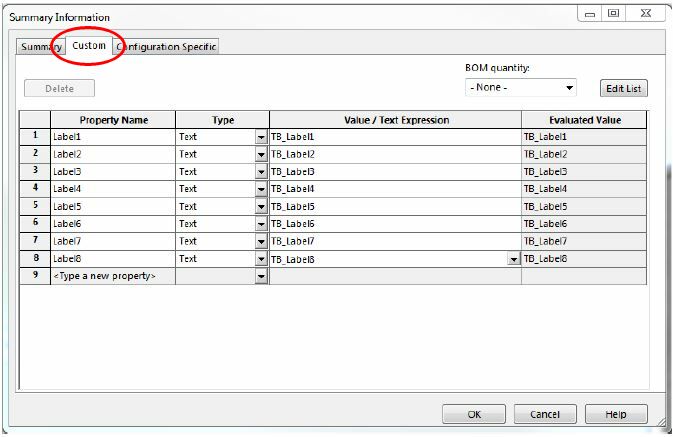
4) You will need to type in the names of the label fields. Solid-CIM 3D can collect up to 8 pieces of information. The name of the custom Solidworks properties must be as follows:
Label1
Label2
Label3
Label4
Label5
Label6
Label7
Label8
When adding the name, you will then need to fill in the value that you want the name to have.
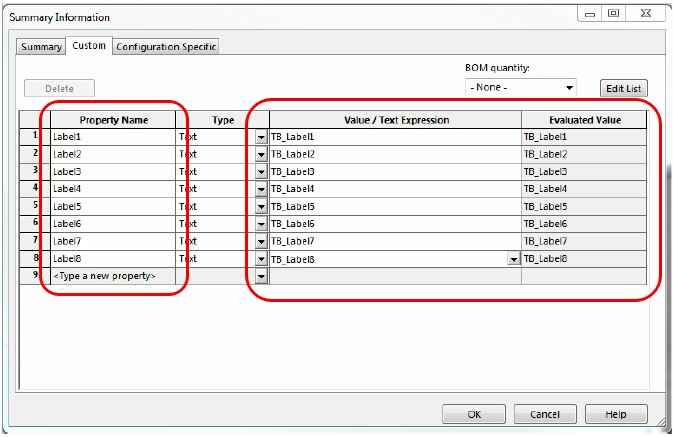
5) Once you have everything entered, select the 'OK' button at the bottom of the window and the Solidworks properties will be applied to the part.

