Adding Name/Label Information in Autodesk Inventor
Adding a Name to a 3D Solid in Autodesk Inventor:
Naming a 3D solid in Autodesk Inventor is not necessary. The name of the Autodesk Inventor .IPT file becomes the name of the part when it is processed through Solid-CIM 3D.
Adding Label Information to a 3D Solid in Autodesk Inventor:
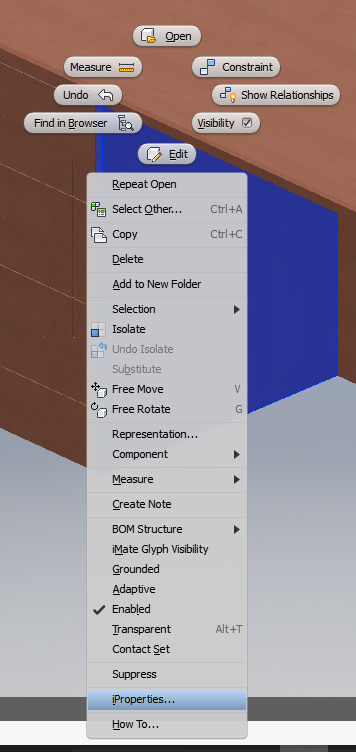
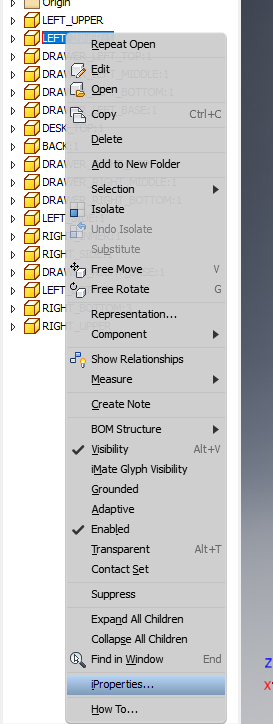
1) Select the part in the Inventor assembly or in the part view.
2) Right-Click on the part itself or on the part in the model tree and select the iProperties option.
Note: If you have multiple assemblies in an Inventor assembly, you may need to go to the assembly level to access the part.
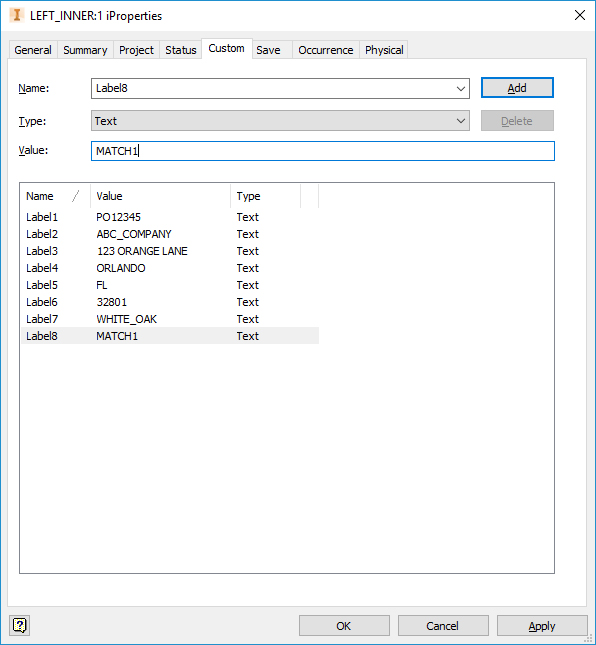
3) Once you select the iProperties option, it will open the Inventor iProperties window where you will select on the tab 'Custom'.
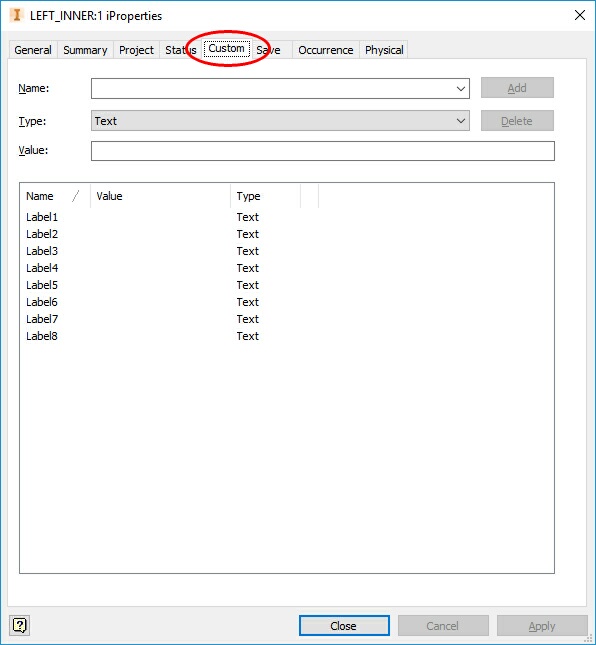
4) You will need to type in the names of the label fields. Solid-CIM 3D can collect up to 8 pieces of information. The name of the custom iProperties must be as follows:
Label1
Label2
Label3
Label4
Label5
Label6
Label7
Label8
When adding the name, you will then need to fill in the value that you want the name to have.
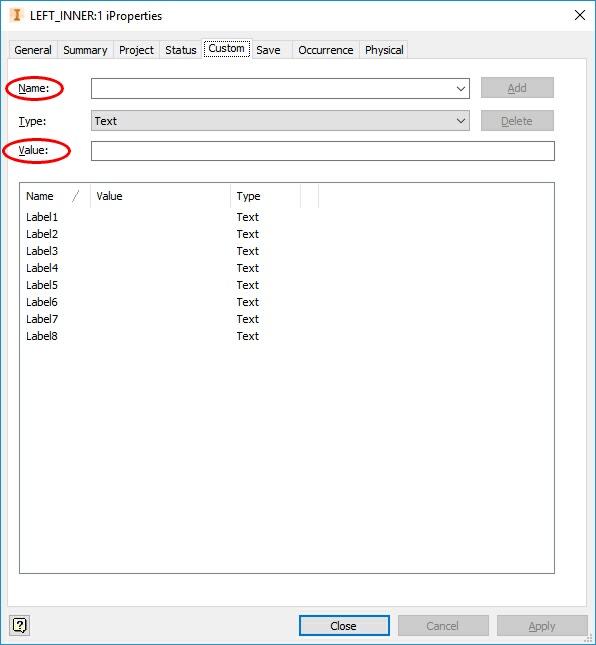
Once you have entered the correct name and the value associated to the name, you can select the 'Add' button.
5) Once you have everything entered, select the 'Apply' button at the bottom of the window and the iProperties will be applied to the part.

