|
|

|

|
|||
|
|
|
|
Solid-CIM 3D supports a data link from Autodesk Inventor, Autodesk Revit, SOLIDWORKS and Solid Edge.
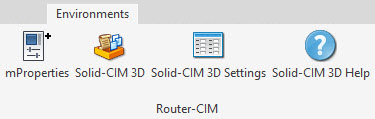
If you are creating parts and/or assemblies in Inventor, you can use the Solid-CIM 3D Connect to export the data from Inventor into feature recognized, layer separated drawings for use directly in Router-CIM Automation Suite.
To use the Solid-CIM 3D Connect, prepare your Inventor drawing by displaying the items in the part or assembly you wish to export (turning off elements you do not wish to export, such as hardware or specific parts). Next select Environment >> Solid-CIM 3D and the Solid-CIM 3D Connect will export the parts from Autodesk Inventor, Autodesk Revit, SOLIDWORKS and Solid Edge, into AutoCAD and run Solid-CIM 3D on the parts to recognize the features and then export the layer separated drawings into a folder on your system. Along with the folder, you will also have a CSV file which can be used to directly import the parts into Router-CIM Automation Suite for processing.
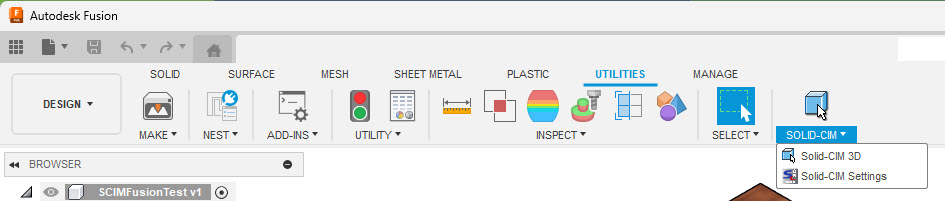
Autodesk Fusion:
When using Autodesk Fusion, when a 3D solid or 3D assembly is ready to be processed through Solid-CIM 3D, you will find the Solid-CIM button located under the 'Utilities' ribbon bar. You have the option to run Solid-CIM 3D or access the Solid-CIM Settings from here.
When the Solid-CIM 3D option is selected, you will be prompted with this message:
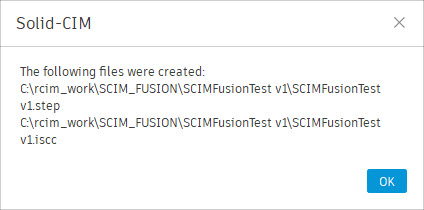
Solid-CIM 3D will create a STEP file and an ISCC file that contains the 3D solid name and material information.
The location of all models/assemblies from the Fusion 360 Solid-CIM 3D process will be located in C:\rcim_work\SCIM_FUSION folder. In this folder Solid-CIM 3D will create a folder by the name of the saved Fusion project.
Once this process has been completed, you will go into AutoCAD for the Solid-CIM 3D process to analyze the STEP file created by Solid-CIM 3D in Fusion.
In AutoCAD, you will type in the SCIM360 command and hit enter:

This will open a dialog box allowing you to navigate to C:\rcim_work\SCIM_Fusion folder and go into the appropriate folder of the assembly you processed with Solid-CIM 3D in Fusion. Select the STEP file and hit 'Open'.
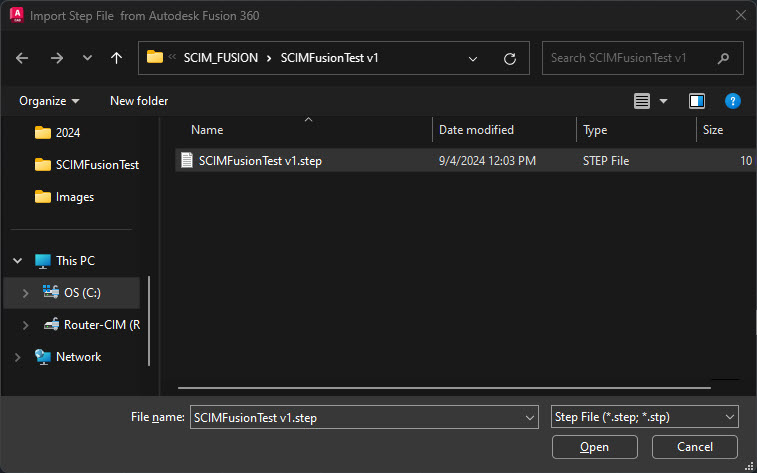
Solid-CIM 3D will import the STEP file and ISCC file in order to get the correct names and materials from Fusion. You will then process your assembly in AutoCAD as described in the Solid-CIM 3D section.