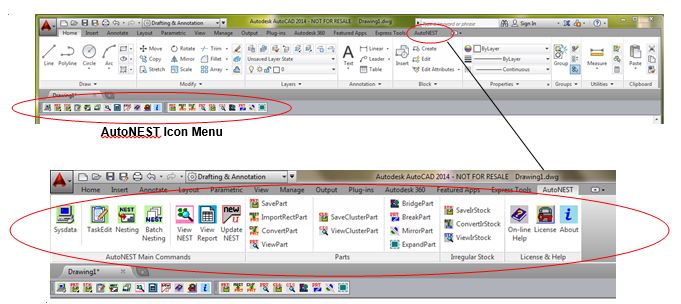
The step-by-step work flow of AutoNEST in the AutoCAD environment is as follows:
(1) Starting AutoNEST
To run AutoNEST, click the Start button (located at the lower-left corner of screen) of your Windows and select Programs à AutoNEST for AutoCAD 200X.
This will launch AutoCAD and AutoNEST. Next, you will see an additional pulldown menu titled “AutoNEST”, located between the “Modify” and “Window” pulldowns.

(2) Create Parts
| There are a number of commands under Parts that will enable you to either save or convert your files /data into AutoNEST Parts. They are :- |
✍SavePart, MirrorPart – save your AutoCAD drawing (must not be a block but AutoCAD entities) into AutoNEST Parts.
✍ConvertPart - converts DXF files (parts in individual DXF files) into AutoNEST Parts.
✍ImportRectPart - imports rectangular parts defined in Microsoft Excel or Text files into AutoNEST Parts.
✍
(3)Create Task
This is the task definition stage. Through Windows dialog boxes, the particulars of parts required to be nested onto specified stock sheets are specified. Details such as edge allowances, cutting gaps and other nesting criteria are being specified here. The command name is TaskEdit.
(4) Nesting
After having defined the nesting requirements in the previous stage, Nesting can now be invoked to compute the layout solutions. The resulting layouts are automatically converted into DXF format and displayed onto the current AutoCAD session. Two ASCII text files, two XML files and one Excel file are created to reflect the nesting results.
| (5) | UpdateNEST |
Once a nested layout is displayed onto the current drawing, you can further edit it based on your better judgment and experience using AutoCAD’s move, copy, rotate or delete commands. This process will be invisible to AutoNEST, as such AutoNEST needs to be “updated” so that new utilization percentages of the stock sheet can be displayed. This is achieved via UpdateNEST command.
| (6) | ViewNEST |
This command allows you to review layouts of previously nested tasks within current Task/ Parts directory.
| (7) | Auto-Bridge |
You can define the Bridge specifications in TaskEdit. To view the bridged nested layouts, select either ViewNEST or Nesting / BatchNesting commands.
See Command Flow Chart of AutoNest